
Engineered hardwood, laminate, luxury—and standard—vinyl planks and tiles, vinyl sheets, cork tiles, and carpet tiles are all affordable, approachable options.
New flooring doesn’t just significantly boost aesthetics, improving the overall look of the home; it also improves functionality. Laminate, vinyl plank, tile, and vinyl sheet, for example, are notable low-maintenance choices that save weekly cleanup time.
Replacing old carpeting that is home to dust, allergens, and other pollutants will improve air quality and overall home health. Got kids? Pets? Laminate, luxury vinyl plank (LVP), and luxury vinyl tile (LVT) also offer enhanced durability for high-traffic areas. And although a new floor may seem a needless expense, it will increase the overall value of the home at resale, and most modern materials offer energy-efficient properties to reduce the overall utility bills and reduce strain on heating and cooling systems. It all starts with making an informed choice for lifestyle, a DIY skill set, and these handy installation tips.

Classic Wood Feel
Engineered hardwood gives the ambience of real wood without the uberexpensive price tag. It starts with a thin layer of real wood veneer. That means that each plank is unique, laid over high-density fiberboard, plywood, or stone-plastic composite backing. Ratings range from moisture-resistant to 100 percent waterproof, making it ideal for use in bathrooms, kitchens, or even the basement. Some engineered hardwoods can even be refinished or repaired like real wood.
Proper preparation is key. The planks must sit for a minimum of 24 hours to adjust to the room’s temperature before installation and must be installed over an underlayment and moisture barrier to prevent moisture underneath. This also keeps the floor warmer, decreases noise transmission, and extends its lifespan. Planks can be cut—finished side up!—with a miter saw, table saw, circular saw, or handsaw. As with all flooring installations, and particularly wood, it’s advisable to wear a mask and safety goggles during all cutting.

Engineered wood can be installed using traditional methods or, more commonly of late, as a floating floor. The latter “floats” over its underlayment, meaning that it is not directly attached to its subfloor, which allows for more seasonal expansion and contraction.
The Mimic
Laminate flooring starts with a heavy-duty transparent topcoat that makes it highly resistant to scratches, dents, stains, and fading. Below that is a high-resolution image that most often simulates hardwood but can also look like tile or natural stone. Two additional layers follow: a high-density fiberboard over a moisture- and warp-resistant backing. Laminate floors are always floating systems. They are affordable and available in a wide range of styles, patterns, and finishes to suit every decor. However, laminate is typically not fully waterproof (fast spills and cleanup are fine), and it’s harder and noisier underfoot. Also, it cannot be refinished.
Laminate planks must acclimatize to the room for a minimum of 48 hours. Start with a test layout (i.e., lay out a few rows of planks without securing them to determine whether adjustments to the first row are needed). Plan the layout carefully to try to avoid unprofessional-looking small planks at the edges. Be sure to use spacers around the room for a proper expansion gap (this will be covered by baseboard installation or reinstallation). Install transition strips (that hide this gap) where the laminate meets other flooring or flows through multiple rooms.
The World of Vinyl
Whether luxury or standard, vinyl plank, tile, and sheets all start with a brawny topcoat that protects them from scratches and wear. Underneath is a realistic-looking wood-look or tile-look printed design layer. That is followed by a polyvinyl chloride core layer and a backing layer for stability and cushioning. LVP and LVT typically offer a thicker top layer for greater durability, an enhanced core (including wood plastic composite and/or stone plastic composite), advanced printing techniques for an ultra-realistic design layer, and even embossing to enhance the “real feel.” This all adds up to a product that is waterproof and perfect for wet locations such as bathrooms, as well as dry areas.
Vinyl needs to acclimatize for 24 to 48 hours before installation—always check with the manufacturer for details. Most LVP or LVT does not need underlayment. Check the box to see whether it’s “attached” or “requires underlayment.” Even if it is “attached,” one may want to consider underlayment anyway if noise transmission is a concern or if the subfloor has minor flaws such as uneven areas or small dips, as a separate underlayment will help smooth them out. Always use an underlayment with a moisture barrier over a concrete subfloor to protect the vinyl from any moisture coming up from below.
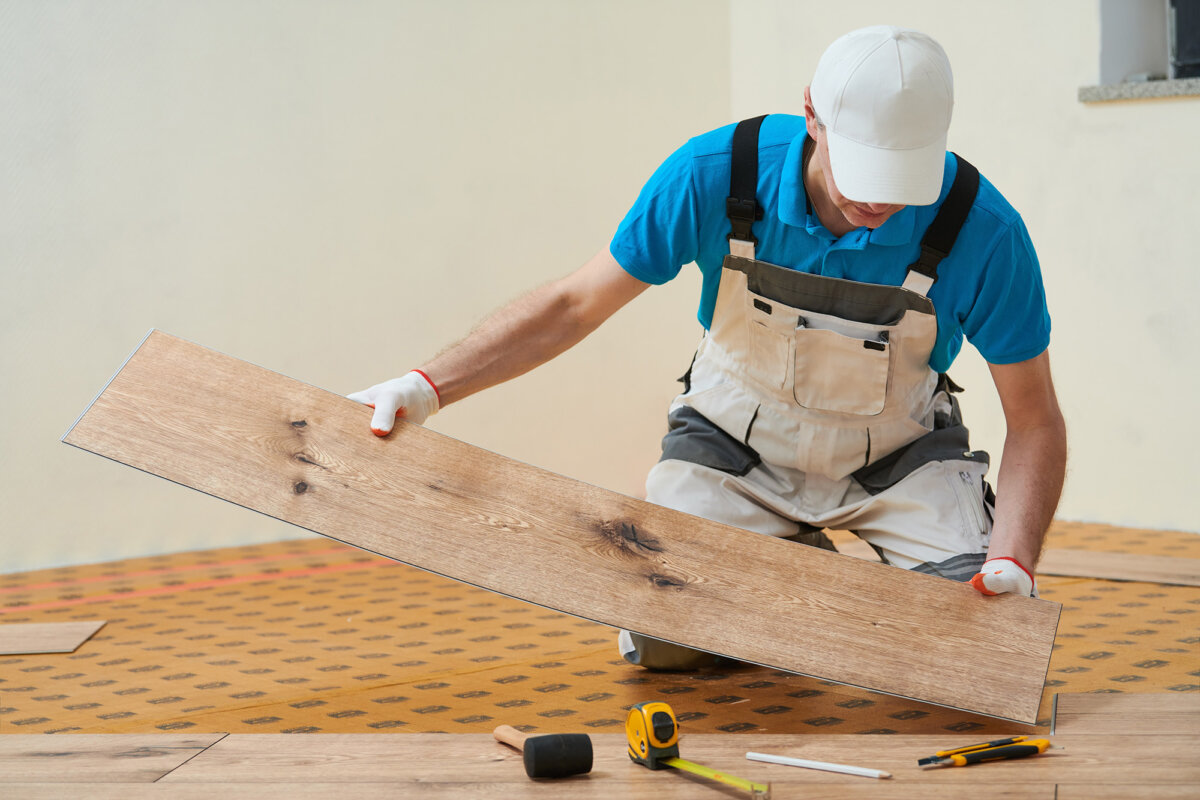
Vinyl plank and tile are extremely easy to cut with a utility knife. Just be sure to replace the blade often for consistently clean cuts. Score it deep, then give it a quick snap. Measure each row during installation, as rooms that seem to have perfect walls rarely do; be sure to allow one-quarter of an inch for an expansion gap that is ultimately covered with baseboard. Spacers come in handy for this purpose. For sheet vinyl, be sure to roll it out slowly, smooth out wrinkles (a rolling pin works great), and trim around edges and fixtures, leaving a quarter-inch expansion edge.
Handyman Tip: Making a template out of cardboard works well for structural objects such as a toilet or pedestal sink base in a bathroom install, etc.
____________________
Step in Style
Area rugs are the easiest way to update a floor. These tried-and-true design elements offer style, cushioning, and comfort. They warm a room.
Versatile Cork
Naturally waterproof and hypoallergenic, anti-microbial cork keeps the home warmer in winter and quieter overall. Available in planks and tiles, thinner pieces can be cut with a utility knife. Thicker pieces will need a fine-toothed circular saw or table saw blade.
Carpet Squares
Carpet tiles are well-suited to heavy-use areas, where wear or damage may require replacement of sections, but not the whole floor. Available in nylon, polypropylene, polyester, and wool, they can be adhesive-backed, installed with specialized double-sided tape, or available as an interlocking system.
Linoleum
Old-fashioned linoleum is making a comeback, and with good reason. Its linseed oil, wood flour, and cork components make it very environmentally friendly. Plus, it withstands heavy traffic, dents, and scratches. However, it is susceptible to excessive moisture.
