Many jobs have us sitting for a surprisingly long time these days. Even in healthcare, I’ve noticed, which has been fascinating to watch evolve. The actual delivery of physician, therapy, and nursing services is an active endeavor; however, the ever-increasing amount of paperwork required exposes us to an increasing amount of “seat time.”
It’s certainly no better in many other forms of employment; many people sit for almost their entire workday. Social media and other online resources often encourage us to remain sedentary upon our return home.
One of the biggest problems of sedentary behavior is the development and progression of chronic health problems. Beyond that, however, is another serious problem: tightness. Long periods of sitting generally keep your hip girdle in a static position, and one thing that muscles and joints don’t like is sitting almost completely still for extended periods.
If your hips sit still long enough, they can become pathologically stiff, which can interfere with your mobility, functional independence, and overall quality of life.
Let’s do something about that.
5 Hip-Opening Exercises to Alleviate Sitting Stiffness
The following exercises are like aces up your sleeves when it comes to fixing hip tightness. They stretch and loosen tight hips so you can have the best flexibility and functional capability, and they can also impart a feeling of greater independence.
They work well for my patients, and I use them myself, often when I finish writing articles. I do, however, suggest that you consult with your medical provider to ensure that they are appropriate for you.
1. 90/90 Stretch
We can accomplish a great deal at floor level, and the “double 90” is a great place to start. This exercise uses rotation movements and positioning to perform its magic.
Step 1: Sit on the floor with your feet approximately three feet apart. Bend your hips and knees to 90 degrees and place your heels on the floor.
Step 2: Rotate your body to the right and lower your legs down until they touch the floor without moving your heels—you will roll onto the side of your legs.
Step 3: Place your right hand on the floor and gently lean forward, placing a strong stretch on your hip muscles. Hold this position for approximately 10 seconds, then return to the starting position, roll to the left side, and repeat the movement.
Step 4: Leaning forward and holding on the right side, then the left, counts as one repetition. Try to perform three sets, holding on each side.
Modifications: If you can’t move all the way to the ground with this stretch, bring your knee over as far as you can at first and then double the hold time to approximately 20 seconds. This can often allow tight muscles and joints to settle a little deeper into the stretch.
Why I Like It: The 90/90 provides a highly effective hip stretch, and it also feels good to alleviate the tightness from prolonged sitting.
2. Sitting Figure 4 Stretch
I perform the seated figure four stretch every day. I tend to have stiff hips to begin with, and getting older isn’t helping the situation at all. Although my piriformis muscles are very stiff at the outset of the stretch, I feel a whole lot better when I’m done, as the figure four focuses squarely on those exact muscles. With piriformis muscles, prevention is better than cure, so it pays to give them a regular stretch.
Step 1: Sit toward the middle or forward edge of a sturdy chair. Cross your right leg over your left, with your right ankle just behind your left knee. Use your arms to help move your leg if you can’t move into position easily. Allow your right knee to relax down as far as it will go while keeping your ankle in place.
Step 2: Slowly bend forward at the hips as far as you comfortably can while keeping your back straight; hold this stretch for one minute—or as long as you can comfortably tolerate—before returning to the starting position. Then repeat the stretch on the left side. Try three one-minute stretches per side.
Modifications: If you can’t move very far into the stretch, just move as far as you can and hold the stretch, keeping your back straight. You will likely gain greater flexibility with practice.
Why I Like It: The seated figure four provides a deep stretch for your piriformis muscles and can free up extra hip movement. It can also dramatically decrease hip pain—an amazing benefit on its own.
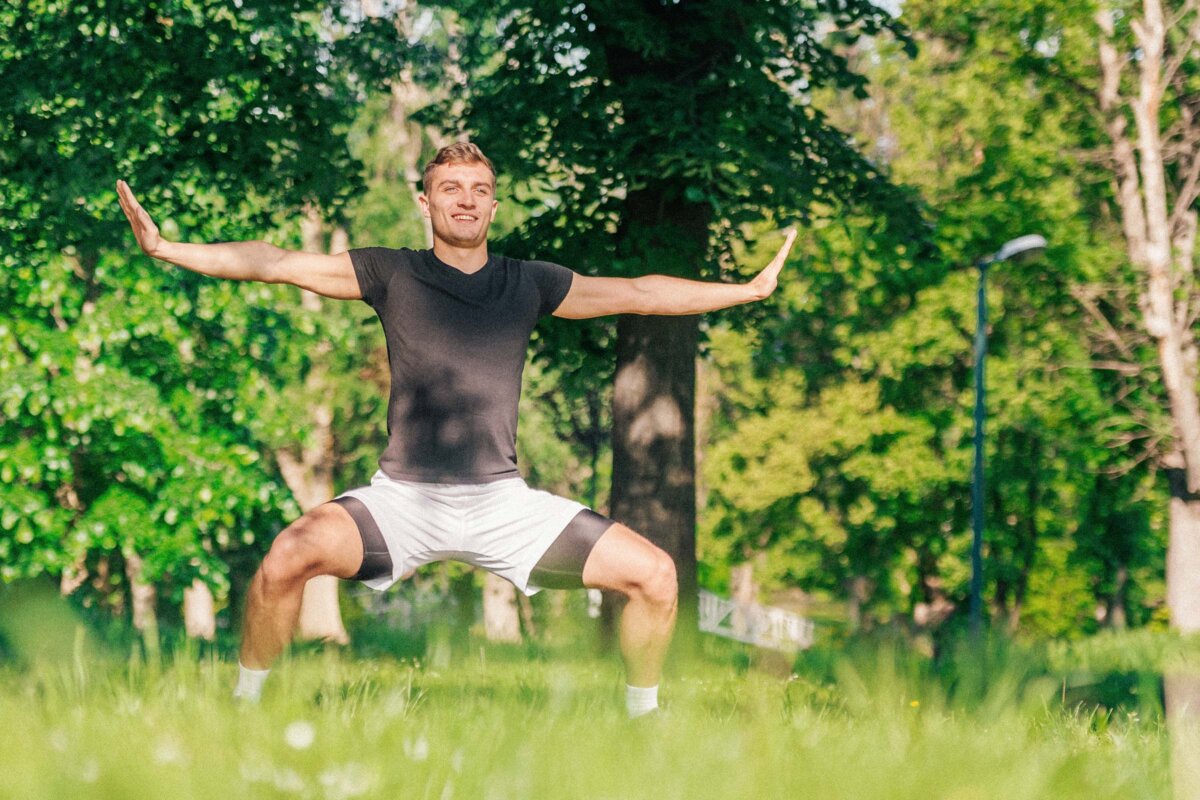
3. Victory Squat
Also known as the goddess squat, this positional hold exercise is strong magic for your hips.
Step 1: Stand with your legs approximately three feet apart, with your feet rotated about 45 degrees to the sides.
Step 2: Squat down as far as you comfortably can, ensuring that your knees move in the same direction as your feet are pointing. At the same time, lift your arms above your head in a “V” shape.
Step 3: Try holding the squat for approximately 60 seconds, or as long as you can, before returning to the starting position.
Step 4: Each squat-hold counts as one set. Try to perform three 60-second sets.
Modifications: If you can’t go down very far, just go down as far as you can. Be sure to keep your knees moving outward during the squat-stretch instead of letting them drift inward, which can be uncomfortable for your hips.
Why I Like It: Both challenging and rewarding, this positional hold is strong magic for your hips—you can’t hold a candle to it when it comes to results.
4. Happy Baby Pose
I love the happy baby pose because it’s easy to perform, and yes—it makes you happy. However, don’t let that fool you. The happy baby pose accomplishes a bundle in a highly controllable manner.
Step 1: Lie on a firm, supportive surface with your hips and knees flexed, your feet flat on the floor, and your arms by your sides.
Step 2: Bring your knees up as high as you can and grab hold of the outside of your feet. Keeping your hips flexed and knees high, gently pull your feet apart and down as far as you comfortably can, then hold for 10 seconds before returning to the starting position.
Step 3: Each hold-stretch counts as one set. Try to perform five total sets.
Modifications: If you can’t quite reach all the way to your ankles, reach as far down your leg as you can. You can also place your hands on the inside of your feet over the arches as a variation—see what works best for you. If you want to bring even more happiness into the exercise, feel free to rock from side to side.
Why I Like It: The happy baby pose is fun and intuitive. Beyond that, it is very stable and effective.
5. Frog Pose
The frog stretch is an intuitive movement that most people can master, and it’s easily adjusted to different levels of ability. It’ll leave you feeling so good afterward that you might even feel a little bit “froggy”—in a good way.
Step 1: Start on your hands and knees. Move your knees out as wide as you comfortably can, and move your feet out a little wider than that.
Step 2: Keeping your lower body in place, move down onto your elbows. You should feel a good stretch starting in your hips and inner thighs. We will consider this the starting position.
Step 3: Now let’s intensify the stretch. From your current position, move your body backward to “sit” deeper into the stretch. Move as far back as you comfortably can and hold the stretch for about 10 seconds, before moving forward again.
Step 4: Each “sit” and hold counts as one set. Try to perform five sets.
Modifications: Pay careful attention to your set movements. Don’t rush the hold counts or the movements. It can help to perform deep breathing for relaxation during the “sitting” phase. Only ever move into the stretches as far as you comfortably can.
You may wish to place pads, such as folded towels, under your knees for comfort if needed. Feel free to play with foot positioning.
Why I Like It: The frog pose provides a wonderful, deep stretch and is superbly easy to modulate.
Together, these exercises can help loosen stiff hips and give you the mobility and independence you deserve. I suggest performing them at least three times per week, and ideally five. I encourage you to try them, because I think you’ll like them. Good luck, and I hope they benefit you well.
About the Fitness Model: Aerowenn Hunter is a health editor for The Epoch Times. She’s an accredited yoga therapist with more than three decades of teaching experience.
Views expressed in this article are the opinions of the author and do not necessarily reflect the views of The Epoch Times. Epoch Health welcomes professional discussion and friendly debate. To submit an opinion piece, please follow these guidelines and submit through our form here.