



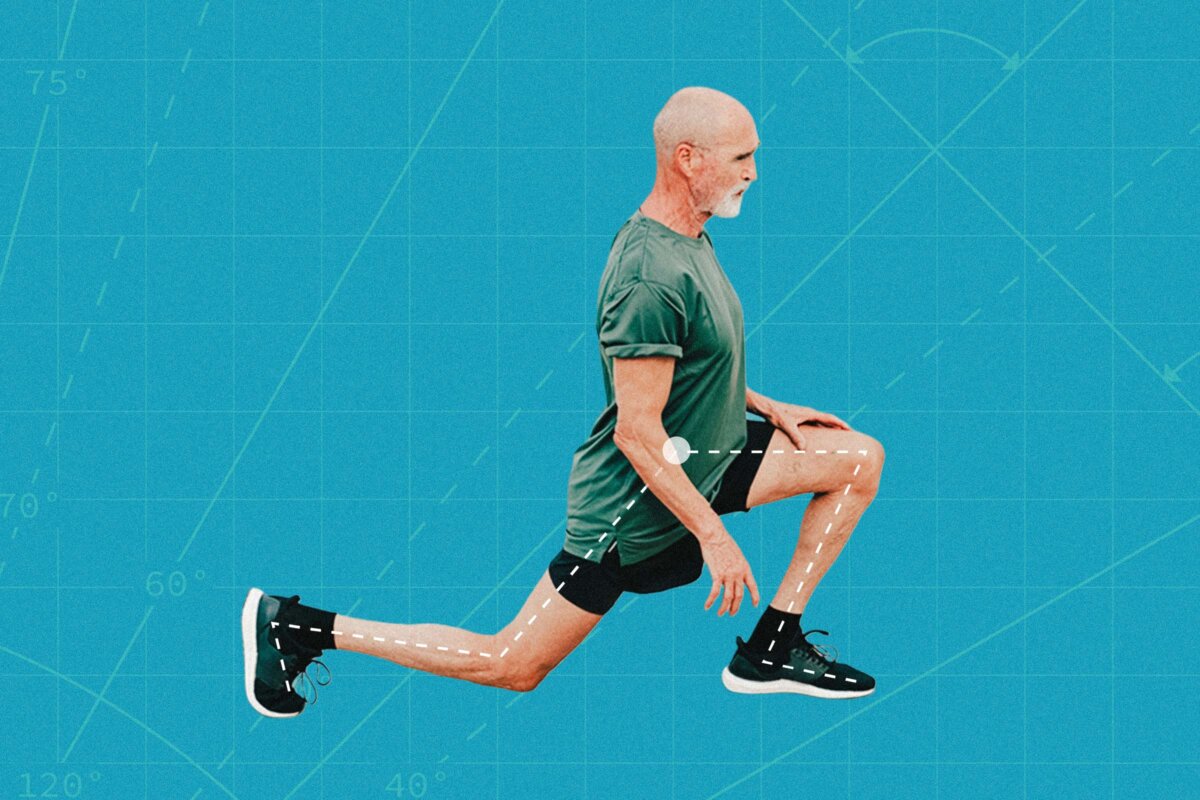
Among classic bodyweight exercises, the lunge has perhaps the most interesting backstory.
Our best understanding of the origins of the modern lunge movement comes from 17th-century sword-fighting manuals. Specific references appeared in works by Salvator Fabris and Ridolfo Capoferro in the very early 1600s, and a later, more specific reference was made by fencing master Nicolas Demeuse in the 1700s. These were all very, uh, sharp fellows.
The basic biomechanical aspect of the classic lunge movement is a step out of the base of support, the area beneath the body that provides stability, with one foot while the other remains anchored in place. While classic squat movements involve a bilateral physiological movement that generally results in a change in elevation—from standing to squatting—lunge movements change both elevation and horizontal position.
The intrinsic asymmetrical biomechanics of the lunge exercises increase the use of your postural stabilizers (the muscles that help keep you upright), thereby strengthening your core musculature and overall balance.
5 Essential Lunge Exercises
Lunges are a step toward better health. They are low-impact and can give your leg muscles a great workout. These exercises work well for my patients, and I think they may work well for you, too.
I do suggest that you speak with your medical provider first to ensure that these exercises are appropriate and safe for you.
Practice Tip: For a greater challenge in all of the following lunge exercises, feel free to hold weights, such as dumbbells, while performing them.
1. Classic Lunge
This is the classic sword fighter’s lunge, except you’re not trying to stab anyone. Also, instead of partially flexing your leading leg and trailing knee, fully flex your front knee to 90 degrees and touch the floor with your trailing knee. This exercise focuses keenly on your quads and glutes, and it also involves a great deal of ankle, hip, and trunk work as you stabilize the movement.
Step 2: Take a large step forward with your right foot. Lift your left heel off the ground, and pull your shoulder blades back while bringing your head up high. Keep your trunk upright.
Step 3: Bend your right knee and move into the lunge, bringing it to 90 degrees of flexion or as far as you can comfortably bend it. At the same time, allow your left knee to bend and slowly lower it until it gently touches the floor. Rise back up into the starting position. You can alternate legs or do them all on one side, and then the other—whichever better suits you.
Step 4: Moving to the floor and back to the starting position counts as one repetition. Try to perform three sets of 10 repetitions.
Note: For beginners or those with knee pain, keep the knee aligned over the ankle; otherwise, as long as it is within your natural range of motion, you can allow your knee to move forward, provided your front heel stays firmly pressed into the ground and you feel no pain. Moving forward with ease depends on ankle and hip mobility, as well as overall control.
Modifications: If you have painful knees or limited range of motion, take your back knee down only as far as you can comfortably manage. It’s still effective wherever you end up, and you’ll strengthen as you go. If you struggle to maintain your balance or rise back up from the low part of the lunge, perform the exercise next to a couch, chair, table, or counter for support.
Why I Like It: The lunge is a robust exercise that challenges your muscles and balance at the same time. I very much like that it trains your postural balance stabilizers through a dynamic range of movement, including a high-low-high progression as you move into and out of the lunge.
2. Curtsy Lunge
The curtsy lunge swaps the forward-and-back movement of the standard lunge for a crossover, side-to-side movement, which focuses heavily on your inner and outer thighs—your hip abductors and adductors (the muscles that move your legs away from and toward the center of your body). This is a great exercise for increasing your smoothness and control during lateral movements, thereby enhancing your balance. It can also maximize lateral hip mobility.
Step 2: Step your right foot back behind your left foot as far as you comfortably can. Lower your right knee to gently touch the ground, return to the starting position, then perform the same movement on the other side.
Step 3: Moving into a lunge and then returning to standing counts as one repetition. Try to perform three sets of 10 repetitions per side.
Modifications: The curtsy lunge can be a little challenging balance-wise, so hold on to a countertop or piece of furniture as needed. Lower down only as far as you comfortably can, because it can be hard at first to rise back up from a full lunge using the muscles of predominantly one leg.
Why I Like It: The enhanced focus on hip abductor/adductor strengthening and the increased balance demands translate well to real-world balance and function, especially in reducing the risk of falls.
3. Lateral Lunge
While the curtsy lunge offers an excellent balance payoff, the lateral lunge builds on the initial abductor and adductor work of the curtsy lunge and kicks it up a notch. This exercise is fantastic for growing more comfortable with lateral stepping movements while increasing muscle strength.
Step 2: Keeping your back and head upright, slowly take a large step to the side with your right foot and squat down until you reach 90 degrees of knee flexion in one smooth movement, keeping your left knee straight.
Step 3: Slowly return to standing, then repeat on the other side.
Step 4: Moving into a side lunge and then back up counts as one repetition. Try to complete three sets of 12 repetitions.
Practice Note: Although I suggest alternating between left and right lateral lunges, feel free to experiment with alternating sides or performing all the movements on one side and then the other. See what works best for you.
Modifications: Only step and lower into the lunge as far as you comfortably can. Stepping too far can make it difficult to push yourself back to standing, and lowering too far can outstrip your leg’s ability to push back to standing. Although balancing in this exercise is fairly easy, I suggest standing next to a stable surface at first.
Why I Like It: The lateral lunge is beautiful for maximizing lateral stepping. I see many people get rusty with sidestepping as they get older, losing both hip mobility and their tendency to use the movement in their daily lives—a kind of chicken-and-egg situation. Consequently, their gait pattern reduces to essentially forward-stepping and small-step rotations, which not only leads to a feeling of decreased ability but also functionally results in exactly that. You feel less capable, because you are less capable.
[series_posts_list][/series_posts_list]
4. Reverse Lunge
The reverse lunge emphasizes gluteal and hamstring activation, provides excellent practice for standing up from a kneeling position (which can be laborious when weakness is present), and reduces movement stress on the leading knee.
Step 2: Take a large step straight back with your right leg, then slowly lower down until your right knee gently touches the floor. Keep your trunk upright, your shoulders back, and your head up the whole time to distribute as much body weight as possible to the rear foot throughout the movement.
Step 3: Moving into a lunge and returning to standing counts as one repetition. Try to perform three sets of 12 repetitions per side.
Modifications: Lower only as far as you comfortably can. If you start to feel like you’re losing control of the movement, stop and return to standing. Keeping your trunk upright and your head and shoulders back keeps the weight bias toward your rear foot.
Why I Like It: I find this lunge to be easy on my knees, and it challenges my balance almost as much as the curtsy lunge, while ultimately being vastly more controllable.
5. Walking Lunge
A classic lunge moves with one foot and then returns it to the starting position once you rise back up. A walking lunge, on the other hand, involves lunging with one foot, then bringing the rear foot forward into the next step. It’s a funny-looking walk that will make your muscles squawk.
Step 2: Take a large step forward with your right leg and bend your knee into a lunge.
Step 3: Bring your back leg forward into the next step and lunge with that leg. It’d be a hard way to get around in Walmart, but it’s a great combined strengthening and balance-building exercise.
Step 4: Each step forward counts as one repetition. Try to perform three sets of 10 steps, or, depending on the space you have, just keep moving forward as far as you like. Feel free to modify your sets and reps to suit your needs and abilities.
Modifications: Lunge only as far as is comfortable. If you can’t do much at first, don’t worry. You will definitely get better over time. Stopping short of fully lowering your rear knee can be easier on both knees and help you succeed. Don’t rush it because it’s easy to lose control when you do.
Why I Like It: Since you rise on the front leg, this exercise places a great deal of emphasis on the lead quadriceps and gluteal muscles—great for high-intensity strengthening. It also places a great deal of asymmetrical balance demands on your front ankle, which is great for training the muscles that help preserve your balance.
Lunges are amazing strengthening exercises that carry the decided side benefit of enhancing your balance, and I can’t recommend them enough. Get good at them, and you can be amazingly sure-footed, and your hips will enjoy wonderful mobility as a consequence. I suggest performing them at least three days per week, ideally five. Good luck, and I hope they work well for you.
About the Fitness Model: Aerowenn Hunter is a health editor for The Epoch Times. She’s an accredited yoga therapist with more than three decades of teaching experience.
Views expressed in this article are the opinions of the author and do not necessarily reflect the views of The Epoch Times. Epoch Health welcomes professional discussion and friendly debate. To submit an opinion piece, please follow these guidelines and submit through our form here.